How to grow bell peppers at home
Pepper varieties suitable for home on a balcony or windowsill
Not all varieties of bell peppers grow well at home. It is better to choose compact, low-growing and early-ripening hybrids that do not require much space and have time to ripen in a limited space.

Good options for home:
-
Window miracle – miniature variety (up to 40 cm), fruits are small, but sweet.
-
Dwarf – unpretentious, fruits are conical, suitable for shady places.
-
Kuzya F1 – an early hybrid, resistant to lack of light.
-
Aquarelle – decorative with small bright peppercorns.
What to consider when choosing:
-
Ripening period (optimally – 90–110 days).
-
Bush height (no more than 50 cm).
-
Self-pollination (otherwise you will have to pollinate manually).
If you want variety, you can try hot peppers – they also grow well in pots.

When is the best time to plant peppers
Planting times depend on growing conditions and the desired harvest time. Peppers can be planted in an apartment almost all year round, but it is better to choose a period with increasing daylight hours.
Optimal planting dates:
-
February-March – if you want an early harvest (fruiting will begin in June-July).
-
August-September – for winter growing with additional lighting from a phytolamp.
What to consider:
-
When planting in winter, plants will need additional lighting (12-14 hours a day).
-
If you plant in the spring, there will be no natural light enough.
-
Seeds germinate in about 7-14 days, and it takes 3-4 months before fruiting - this will help to calculate the timing.
It is better to avoid planting in November-December - due to the short daylight hours, seedlings can stretch out and weaken.

What is needed to grow peppers at home
To successfully grow bell peppers at home, you will need certain materials and tools. Proper preparation will help to avoid problems at the early stages and create comfortable conditions for plants.
Main containers:
-
Seedling cups (volume 100-200 ml) with drainage holes
-
Pots for permanent cultivation (3-5 liters per plant)
-
Seedling cassettes with a tray (convenient for mass sowing)
Soil and fertilizers:
-
Ready substrate for vegetables or seedlings (loose and nutritious)
-
Drainage (expanded clay, perlite or vermiculite)
-
Complex mineral fertilizers for vegetables
Tools and additional materials:
-
A watering can with a narrow spout for careful watering
-
A spray bottle for spraying
-
A phytolamp (for winter growing)
-
Wooden sticks or mini-supports for garter
-
Film or glass to create a greenhouse effect during germination
It is important to think about the location in advance - the windowsill or balcony should be sufficiently lit and protected from drafts.
Step-by-step instructions for growing bell peppers at home
Growing peppers from seeds is a fascinating process, but requires attention to detail. By following simple steps, you will get strong seedlings and juicy fruits.
Preparing seeds:
-
Soak the seeds in warm water for 4-6 hours to speed up germination.
-
Treat with a weak solution of potassium permanganate (1%) for disinfection - this will reduce the risk of diseases.
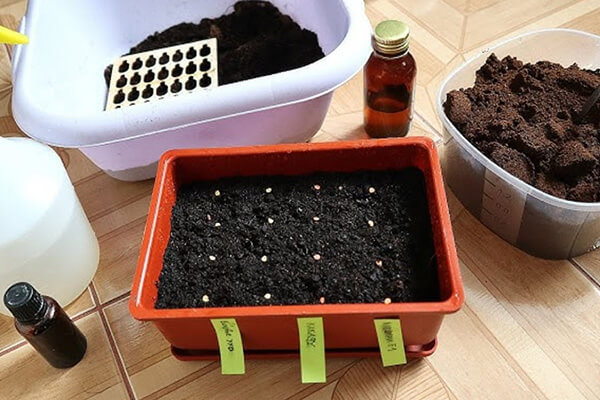
Planting:
-
Fill the cups with moistened soil, leaving 1 cm to the edge.
-
Spread the seeds (1-2 per container), deepening them by 0.5-1 cm.
-
Cover with film and put in a warm place (+25...+28°C).
Seedling care:
-
After the emergence of seedlings (after 7-14 days) remove the cover.
-
Transfer the seedlings to a light windowsill (+20...+23°C during the day).
-
Water moderately, avoiding over-watering.
Picking (if necessary):
If the seeds were sown in a common container, transplant the seedlings into separate pots when 2-3 true leaves appear.
Compliance with these steps will ensure a healthy start for your plants. Further care depends on proper watering, lighting and timely fertilizing.

Caring for seedlings on the windowsill
Young pepper seedlings are especially sensitive to growing conditions. In order for the plants to grow strong and healthy, it is important to follow several key care rules.
Lighting and temperature:
-
The optimal length of daylight is 12-14 hours. If there is not enough natural light, use a phytolamp.
-
Ideal temperature: +20…+25°C during the day and not lower than +16°C at night. Avoid sudden changes.
Watering and humidity:
-
Water the seedlings with warm, settled water (25-30°C) as the top layer of soil dries.
-
Maintain air humidity at 60-70%. If the air is dry, place a container of water nearby or use a humidifier.
Additional recommendations:
-
Regularly rotate the pots so that the plants do not stretch to one side.
-
Start feeding 2 weeks after germination (use complex fertilizers for seedlings).
-
Harden the plants before transplanting: 10-14 days before, start taking them out onto the balcony for a short time.
With proper care, the seedlings will be strong, with a thick stem and dark green leaves - this is the key to a future harvest.

Transplanting seedlings to a permanent place
When the seedlings get stronger and form 6-8 true leaves, they can be transplanted into permanent pots. This stage requires care, as pepper does not tolerate damage to the roots.
Preparation for transplantation:
-
Choose pots with a capacity of 3-5 liters with drainage holes.
-
Put 2-3 cm of drainage (expanded clay, broken brick) on the bottom.
-
Use fertile soil with the addition of compost or vermicompost (20-30% of the volume).
Transplantation process:
-
Water the seedlings well 2 hours before transplantation.
-
Carefully remove the plant with the root ball, trying not to disturb it roots.
-
Place in a new pot, deepening to the first leaves.
-
Add soil, compact slightly and water with warm water.
Post-transplant care:
-
Keep the plants in partial shade for the first 3-4 days.
-
Do not fertilize for 10-14 days - let the roots adapt.
-
Maintain a temperature of +20…+25°C and humidity of 60-70%.
Proper transplantation will minimize stress for plants and ensure their rapid rooting in a new place.
Caring for adult plants
After transplanting, bell peppers enter a phase of active growth and require systematic care. Competent agricultural technology directly affects the quality and quantity of the future harvest.
Watering and fertilizing:
-
Water 2-3 times a week with warm, settled water (+25 ... +28 ° C), keeping the soil moderately moist. In hot weather, water more often, avoiding stagnant water.
-
Feed every 10-14 days, alternating: Organic fertilizers (biohumus, ash infusion - 1 tbsp / l of water).
Mineral complexes with a predominance of potassium and phosphorus (during flowering and fruiting)
Optimal conditions:
-
Lighting: 12-14 hours a day. On northern windows, additional lighting with a phytolamp (30 W per plant) is required.
-
Temperature: +22 ... +26 ° C during the day, not lower than +18 ° C at night. At +30°C and above, flowers may fall off.
-
Humidity: 60-70%. In dry air, spray the foliage in the morning, avoiding water getting on the flowers.
Formation of the bush:
-
For low-growing varieties, remove only weak and thickening shoots.
-
For tall varieties (40-50 cm): Pinch the main stem after 5-6 leaves. Leave 3-4 strong side shoots, remove the rest. Regularly trim the bushthin branches and yellowing leaves.
Pay special attention to support - even compact bushes under the weight of fruits may need to be tied to pegs. If these conditions are met, the plants will bear fruit for 4-6 months.
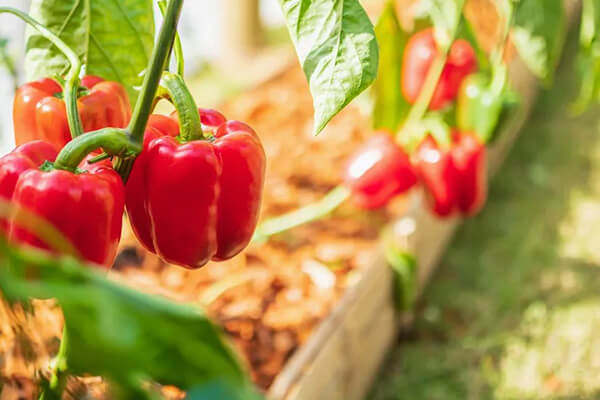
Flowering and fruiting
When the pepper enters the flowering phase, it is important to create optimal conditions for the formation of ovaries and ripening of fruits. At home, the process requires special attention due to the lack of natural pollinators.
Pollination:
-
During the flowering period (usually 2-3 months after germination), shake the bushes lightly every day to spread the pollen.
-
For a guaranteed result, use a soft brush: transfer pollen from one flower to another.
-
The optimal time for the procedure is the morning hours, when the pollen is most viable.
Fruit development:
-
The first ovaries appear 5-10 days after successful pollination.
-
Ripening lasts 3-5 weeks depending on the variety (faster at good lighting).
-
During the period of fruit filling, increase potassium fertilizers (ash, potassium sulfate).
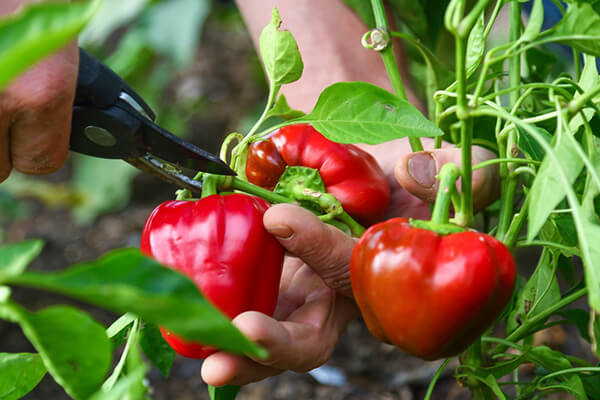
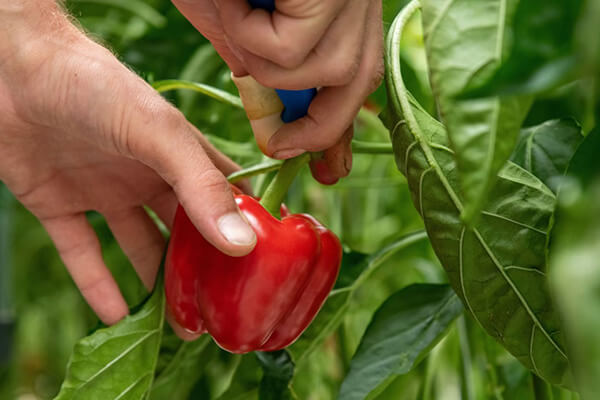
Harvesting:
-
Technical maturity (green fruits) occurs 25-40 days after the formation of ovaries.
-
Biological maturity (coloring in varietal color) - in 45-60 days.
-
Cut the peppers with pruning shears with part of the stalk so as not to damage the branches.
With proper care, one bush can produce 10-15 fruits per season. Regular harvesting stimulates new flowering and prolongs the fruiting period.
Important: if the plant sheds flowers or ovaries, check the soil moisture, temperature and sufficiency of nutrients. Most often, the problem is solved by adjusting these parameters.
| Stage | Terms/Conditions | Actions | Important nuances |
|---|---|---|---|
| Choosing a variety | - | Compact varieties: "Window miracle", "Dwarf", "Kuzya F1" | Bush height up to 50 cm, self-pollination |
| Planting seeds | February-March or August-September | Soaking, treatment with potassium permanganate, deepening by 0.5-1 cm | Germination temperature: +25...+28°C |
| Seedling care | 7-14 days after germination | Watering with warm water, additional lighting for 12-14 hours, fertilizing after 2 weeks | Avoid drafts |
| Transplanting | 6-8 true leaves | Pots 3-5 l with drainage, deepening to the first leaves | Do not disturb the roots, 3 days partial shade |
| Caring for adult plants | The entire growing season | Watering 2-3 times a week, fertilizing every 10-14 days, shaping the bush | At +30°C the flowers fall off |
| Pollination | Beginning of flowering (2-3 months) | Shaking the bushes or manual pollination with a brush | The best time is morning |
| Harvesting | 25-60 days after the ovary | Cutting pruning shears with a stalk | Regular harvesting stimulates new fruiting |
Who will find the table useful?
- For beginners - will help not to miss key stages.
- For control - compare the terms and conditions with the current state of the plants.
- For problem analysis - if the pepper does not bear fruit, check the conditions according to the table data.
Growing bell peppers at home is a fascinating and rewarding process. Even on a windowsill or balcony you can get juicy, sweet fruits if you follow the basic rules: choose the right variety, provide sufficient lighting, regular watering and fertilizing.
The main secrets of success:
-
Don't rush the plants - peppers need time to grow and ripen.
-
Monitor the temperature and humidity - peppers do not like drafts and dry air.
-
Don't forget about pollination - in an apartment this will have to be done manually.
-
Be patient - the first harvest will appear 3-5 months after planting.
Even if something went wrong the first time (the seedlings stretched out, the flowers fall off), do not be upset. Mistakes are part of experience.Try again, adjust your care, and soon you will be able to harvest your own home-grown peppers all year round.
Let your mini-garden bring not only a harvest, but also the joy of the growing process!