Microgreens at home: simple, healthy and delicious!
What are microgreens and what are they used for
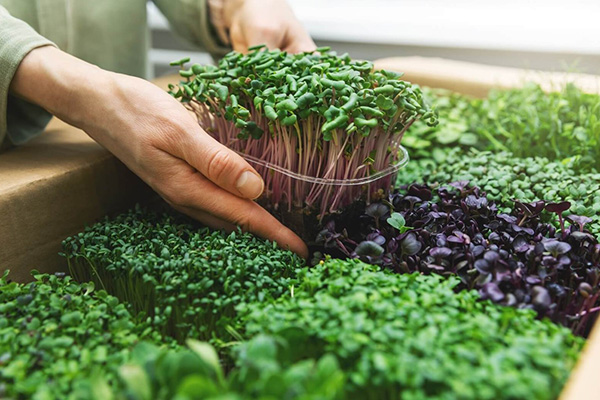
Microgreens are young shoots of plants that are cut at an early stage of growth, usually 7-14 days after germination. Unlike sprouts, where only the roots and cotyledons are eaten, microgreens include the stem and first leaves. And compared to adult plants, it contains much more vitamins, minerals and antioxidants.
Many crops are suitable for microgreens:
-
Vegetables– radishes, beets, sunflower, peas, cilantro.
-
Grains– wheat, oats, buckwheat.
-
Herbs– basil, dill, arugula, mustard.
Microgreens are used not only to decorate dishes, but also to increase their nutritional value. It improves digestion, strengthens the immune system and adds a fresh taste to salads, smoothies, soups and sandwiches.

How to grow microgreens in soil
Growing microgreens in soil is one of the easiest and most accessible methods. The soil provides the plants with nutrients, making the greens juicy and rich in taste. A shallow container (a tray, a container, or even a regular plastic fruit tray) with drainage holes is suitable for this method.
Step-by-step process:
-
Pour a layer of soil (2-3 cm) into the container, moisten it slightly.
-
Spread the seeds evenly over the surface without burying them.
-
Sprinkle a thin layer of soil or press the seeds lightly for better contact with the soil.
-
Cover with film or a lid to create a greenhouse effect until seedlings appear.
-
After germination, remove the cover and place the container in the light.
It is better to water every tray or spraying, so as not to damage the delicate sprouts. The harvest can be cut in 7-14 days, when the plants have their first true leaves.
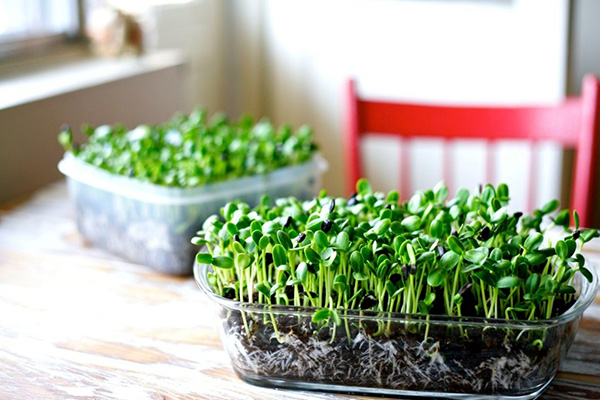
How to grow microgreens at home without soil
Growing microgreens without soil is a convenient and clean method, especially for urban conditions. This method minimizes pollution and allows you to get fresh greens even in a small space. The main thing is to provide the seeds with moisture and air access.
Popular methods of growing without soil:
-
In a jar– the seeds are soaked, then washed 2-3 times a day until they germinate.
-
On paper/napkins– moistened paper serves as a basis for germination.
-
On cotton wool or gauze– the soft texture retains moisture well around the seeds.
-
In hydrogel– polymer granules gradually release water to the sprouts.
Additional options:
-
Special mats for microgreens - made of natural fibers.
-
Sprouters - multi-tiered systems with automatic watering.
Soilless methods require regular watering, but they eliminate the appearance of soil midges and simplify care. The crop is ready for harvesting in a week!
| Criteria | Growing in soil | Soilless methods |
|---|---|---|
| Necessary materials | Soil, container with drainage | Jars, gauze, cotton wool, hydrogel, mats |
| Pros | More juicy sprouts, less watering | Cleanliness, compactness, no soil midges |
| Cons | Risk of over-watering, space required | Frequent monitoring required humidity |
| Harvest time | 7-14 days | 7-12 days |
| Best crops | Sunflower, peas, beets | Radish, arugula, basil, mustard |
Caring for microgreensnew
Microgreens grow quickly, but require attention at every stage. The main conditions for successful cultivation are humidity, light and proper air exchange. Without this, the sprouts can become weak or moldy.
Basic care rules:
-
Watering – maintain moderate humidity, avoiding drying out and over-watering. It is better to use a sprayer or watering through a tray.
-
Lighting – diffused light is ideal (6-8 hours a day). If there is not enough sun, use a phytolamp.
-
Ventilation – ventilate the plantings so that excess moisture does not accumulate.
What to avoid:
-
Direct sunlight – it can dry out tender sprouts.
-
Stagnation of water – this leads to mold and rot.
-
Dense planting – if the seeds are too dense, the plants will be weak.
With proper care, microgreens are ready for cutting in 7-12 days. It is better to harvest in the morning - at this time the sprouts are the juiciest.

Step-by-step instructions for beginners
Growing microgreens is a simple process, but it requires following several key steps. Following these instructions, even a beginner will get fresh greens without much hassle.
1. Preparing and soaking seeds
-
Sort out the seeds, removing debris and damaged specimens.
-
Soak them in clean water for 4-8 hours (except for small seeds like radishes or arugula). This will speed up germination.
2. Sowing and care
-
Evenly distribute the seeds over the selected surface (soil, gauze, mat).
-
Cover the container with film or a lid to create a greenhouse effect.
-
After the seedlings appear (usually after 1-3 days), remove the cover and transfer the plantings to the light.
3. Harvesting
-
Cut the greens with scissors when the first pair of true leaves appear (7-14 days).
-
Consume immediately or store in the refrigerator for 2-3 days in a container with a paper towel.

Do not reuse the substrate for new plantings - this can lead to the development of mold. Each new harvest is best grown on a fresh base.
Problems and mistakes when growing microgreens
Even with the simplicity of the process, beginners often face typical difficulties. Let's look at the main problems and how to solve them.
Common mistakes:
-
Over-watering- leads to mold and rot. Check the humidity with your finger: the substrate should be slightly damp, but not wet.
-
Lack of light- causes sprouts to stretch. If there is no sunny window, use a regular LED lamp for 12-14 hours a day.
-
Too dense sowing- causes uneven growth. Distribute seeds with a gap of 1-2 mm.
Problems and solutions:
-
Mold- reduce watering, provide ventilation. If white coating appears, remove affected sprouts.
-
Slow growth - check the temperature (optimally 18-22°C) and seed quality.
-
Uneven sprouts - most often the reason is poor seed quality or insufficient soaking.
Prevention:
-
Always disinfect containers before use
-
Buy special seeds for microgreens (not treated with chemicals)
-
Do not reuse the substrate for new plantings
Most problems can be solved by adjustments watering and lighting. Watch the plants - they will tell you what they need.

How to use microgreens in cooking
Microgreens are not just decoration, but a full-fledged ingredient with a rich taste and high nutritional value. Their fresh taste and crispy texture can transform even the simplest dishes.
Main ways of use:
-
Fresh salads- microgreens are an ideal combinationwith avocado, nuts and light dressings
-
Smoothies and green cocktails - adds a vitamin boost and fresh taste
-
Side dishes - decoration for soups, pastas, meat and fish dishes
-
Sandwiches and toasts - adds freshness and piquancy
Best combinations:
-
Sunflower and peas - for a rich nutty flavor
-
Arugula and mustard - for a spicy notes
-
Radish - for a fresh, crunchy texture
-
Basil - for aromatic Mediterranean accents
Using tips:
-
Add microgreens at the very end of cooking to preserve vitamins
-
Store unwashed greens in the refrigerator for no more than 3 days
-
Experiment with different types for new flavor combinations
Try replacing regular greens with microgreens in your favorite recipes - you'll be surprised how much it changes the taste of your usual dishes!